Cooking a rotisserie chicken at home can be a highly rewarding culinary experience, providing you with a succulent and flavorful dish that is perfect for family dinners, gatherings, or even meal prep. Using your oven to achieve that perfect golden-brown, crispy skin while keeping the meat tender and juicy might seem challenging, but with the right techniques and tips, anyone can master this cooking method. Whether you're a seasoned cook or a kitchen novice, understanding these key elements will elevate your rotisserie chicken game to new heights.
Why Choose Rotisserie Chicken?

Rotisserie chicken is a delightful dish, beloved for its tender, juicy meat and crispy, flavorful skin. It's a versatile option that can shine as the centerpiece of a dinner table or serve as a handy ingredient in other dishes. The rotisserie cooking method slowly grills the chicken, allowing it to baste in its own juices, resulting in a succulent final product. Opting to make rotisserie chicken at home not only delivers a fresher and often healthier meal but also infuses your kitchen with mouth-watering aromas.
Essential Equipment for Perfect Rotisserie Chicken:
- Rotisserie Kit: A good rotisserie kit is crucial. This typically includes a rotisserie spit, forks, and a motor. The spit and forks hold the chicken in place while the motor ensures consistent rotation, which is essential for even cooking.
- Meat Thermometer: To achieve perfectly cooked chicken, a reliable meat thermometer is indispensable. It helps ensure the chicken is cooked to the ideal internal temperature, preventing both undercooking and overcooking.
- Oven and Drip Pan: A spacious oven is necessary to accommodate the rotisserie setup. Additionally, a drip pan placed under the chicken can catch excess fat and juices, which can then be used to make delicious gravies or sauces.
Preparing Your Chicken for the Rotisserie:
Selecting the Right Chicken
Choose a whole chicken that is fresh and of high quality. Organic or free-range chickens tend to offer better flavor and texture. A chicken weighing around 3-4 pounds is ideal for even cooking.
Brining for Extra Juiciness
Brining the chicken before cooking can significantly enhance its moisture levels. Prepare a brine using water, salt, and sugar, along with optional flavorings like herbs and spices. Submerge the chicken in the brine and refrigerate for at least 4 hours, or overnight for best results.
Seasoning with Rubs and Marinades
Once brined, pat the chicken dry and apply a generous rub or marinade. This mixture can include herbs, spices, minced garlic, and a bit of olive oil. Ensure the seasoning is evenly distributed, both outside and inside the cavity, to infuse the meat with flavor.
Mastering the Cooking Technique:
Trussing the Chicken
Properly trussing your chicken is essential for even cooking and maintaining its shape. Start by placing the chicken on a clean work surface with the breast side facing up. Tuck the wing tips under the body to prevent them from burning. Next, cut a long piece of kitchen twine. Position the center of the twine beneath the tail of the chicken and lift both ends up over the legs. Cross the twine over the legs and pull it tight, then wrap it around the base of the legs to hold them together. Finally, run the twine along the sides of the chicken, pulling it tightly over the wings and securing it with a firm knot at the neck.
Mounting the Chicken on the Rotisserie Spit:
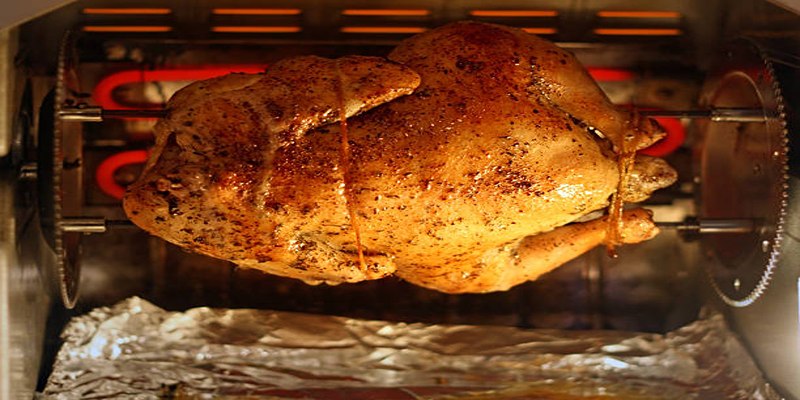
Once trussed, it's time to mount the chicken on the rotisserie spit. Slide the first fork onto the spit, ensuring it is securely tightened. Insert the spit through the cavity of the chicken, so the bird is centered on the spit. Push the second fork onto the spit, securing it into the chicken's cavity, and tighten it firmly. This helps to keep the chicken in place during cooking, ensuring even rotation and resulting in a uniformly cooked bird.
Setting up the Oven
Preheat your oven to about 350F (175C). Place the rotisserie setup inside the oven, ensuring it's securely anchored. Position the drip pan beneath the chicken to catch the juices and fat that will naturally baste the bird as it cooks. You may also add some water or broth to the drip pan to prevent the drippings from burning and to create a steam environment, ensuring the chicken remains juicy.
Cooking the Chicken
Once the oven is ready, start the rotisserie motor so the chicken begins rotating. It should take approximately 1.5 to 2 hours to achieve the perfect rotisserie chicken, depending on the size of the bird and your oven's consistency. Every 30 minutes, check on the chicken. If certain parts are browning too quickly, tent them loosely with aluminum foil to slow the browning process.
Checking for Doneness
Using a meat thermometer, check the internal temperature of the chicken by inserting it into the thickest part of the thigh, avoiding the bone. The chicken is perfectly cooked when it reaches an internal temperature of 165F (75C). If the temperature is lower, continue to cook and check every 10 minutes. Ensure the juices run clear and the skin has achieved a golden, crispy appearance.
Enhancing Flavors and Storage:

Making a Sauce from the Drippings
The drippings collected in the drip pan during the rotisserie process carry an abundance of flavors, perfect for creating a delicious sauce. To start, carefully pour the collected juices into a fat separator, removing excess fat. In a small saucepan, heat the separated juices over medium heat. To thicken the sauce, create a slurry by mixing a tablespoon of cornstarch with an equal amount of cold water. Gradually whisk the slurry into the saucepan, allowing the mixture to simmer until it reaches your desired consistency. For added depth of flavor, consider incorporating minced garlic, a splash of white wine, or fresh herbs such as thyme or rosemary. Season with salt and pepper to taste.
Storing Leftovers
Proper storage is key to maintaining the quality and flavor of your leftover rotisserie chicken. Allow the chicken to cool completely before storing. Place the carved meat in airtight containers or resealable plastic bags, ensuring it is well-sealed to prevent drying out. Store in the refrigerator for up to 3-4 days. For longer storage, you can freeze the chicken in airtight containers or heavy-duty freezer bags, where it will keep for up to 3 months. Label the containers with the date to keep track of freshness.
Reheating Leftovers
To reheat leftover rotisserie chicken while preserving its moistness, preheat your oven to 350F (175C). Place the chicken pieces in a baking dish and cover with aluminum foil. Heat in the oven for about 20-25 minutes, or until the internal temperature reaches 165F (75C). Alternatively, you can reheat smaller portions in the microwave. Place the chicken on a microwave-safe plate, cover with a microwave-safe lid or another plate, and heat on medium power in 1-minute intervals until warmed through. To prevent the chicken from drying out, you may also add a splash of chicken broth or water before heating.
Conclusion:
Rotisserie chicken is a delicious and versatile dish that can be enjoyed in various ways, whether as the star of a meal or incorporated into other dishes. With this guide, you now have all the necessary steps to successfully cook a rotisserie chicken at home. Experiment with different seasonings and sauces to create your own unique flavor combinations. Don't forget to save any leftovers for easy meal planning throughout the week.


